Model Collisions
If you want your models to have functional collisions in s&box, there are a few steps you need to follow to set them up correctly.
Step 1 (optional): Create Collision Meshes
Unless your model is a simple shape (like a box or sphere), it’s a good idea to create custom collision meshes for it. This makes it easier to get accurate collisions without overloading the physics engine.
When creating collision meshes, keep these tips in mind:
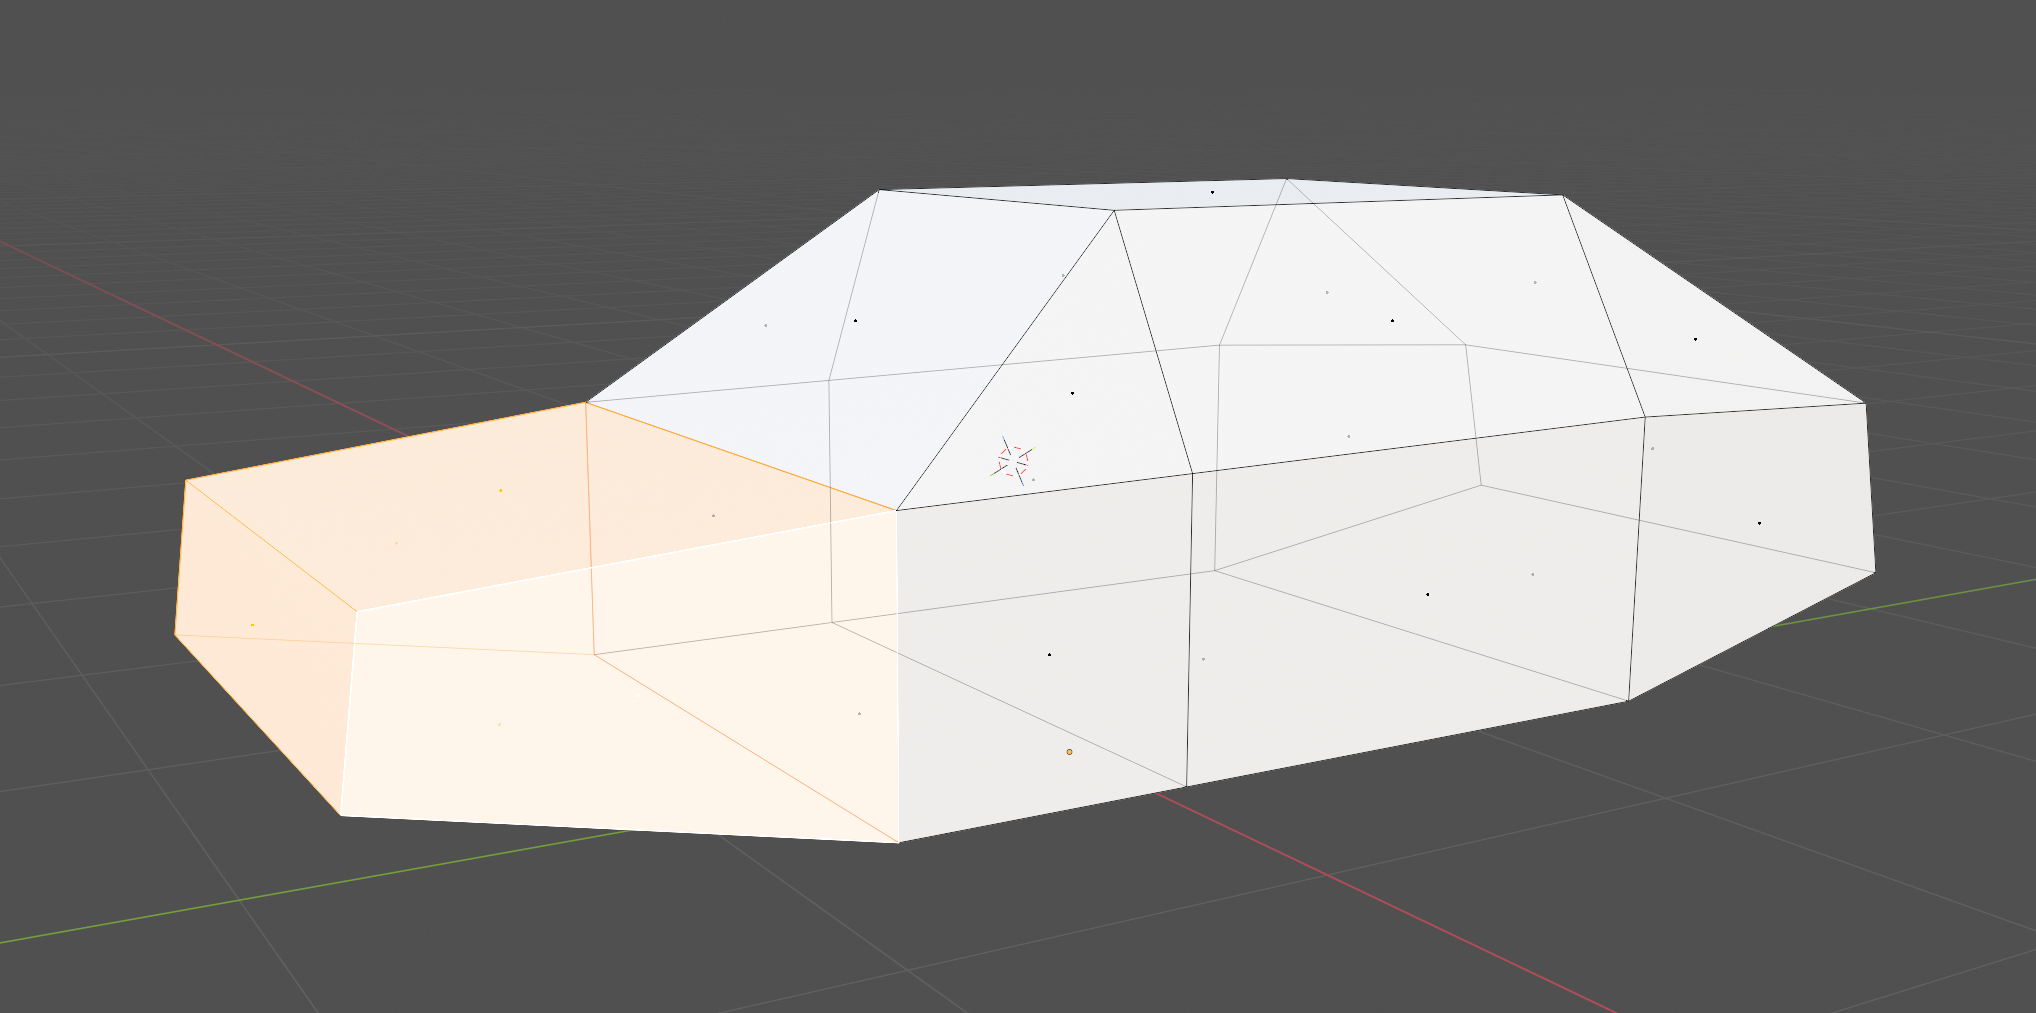
- Each part of the collision mesh has to be convex. If you have a concave shape (like a bowl), you need to break it up into multiple convex parts.
- Splitting parts of the collision mesh so they’re not connected will help when making them convex, as will be seen later. Notice how the front of the car is split from the main body.
- Use simple shapes (boxes, spheres, capsules) whenever possible to reduce complexity.
Step 2: Export Collision Meshes
Export the collision meshes separately from your main model. FBX is a good format.
Step 3: Import into s&box
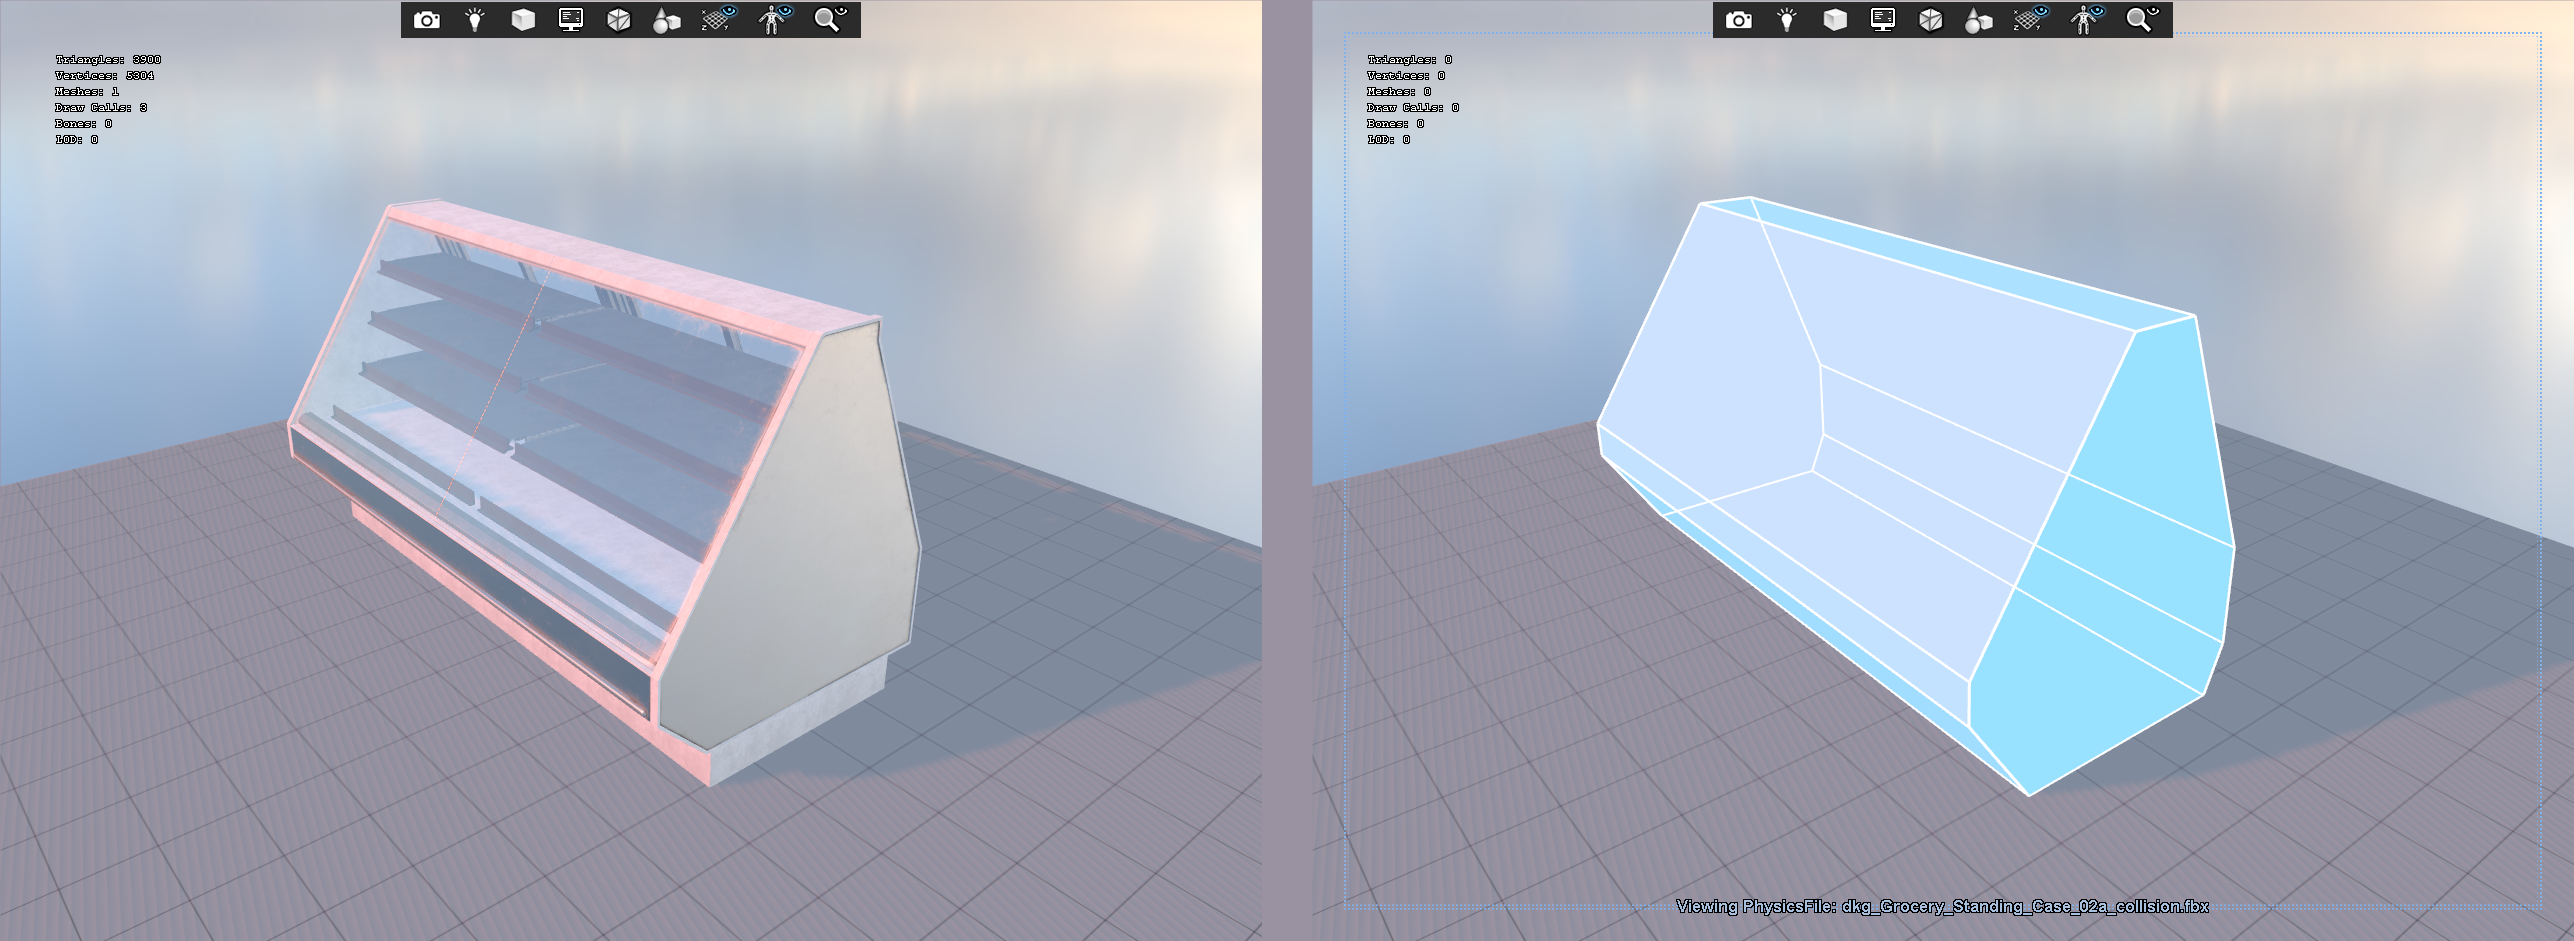
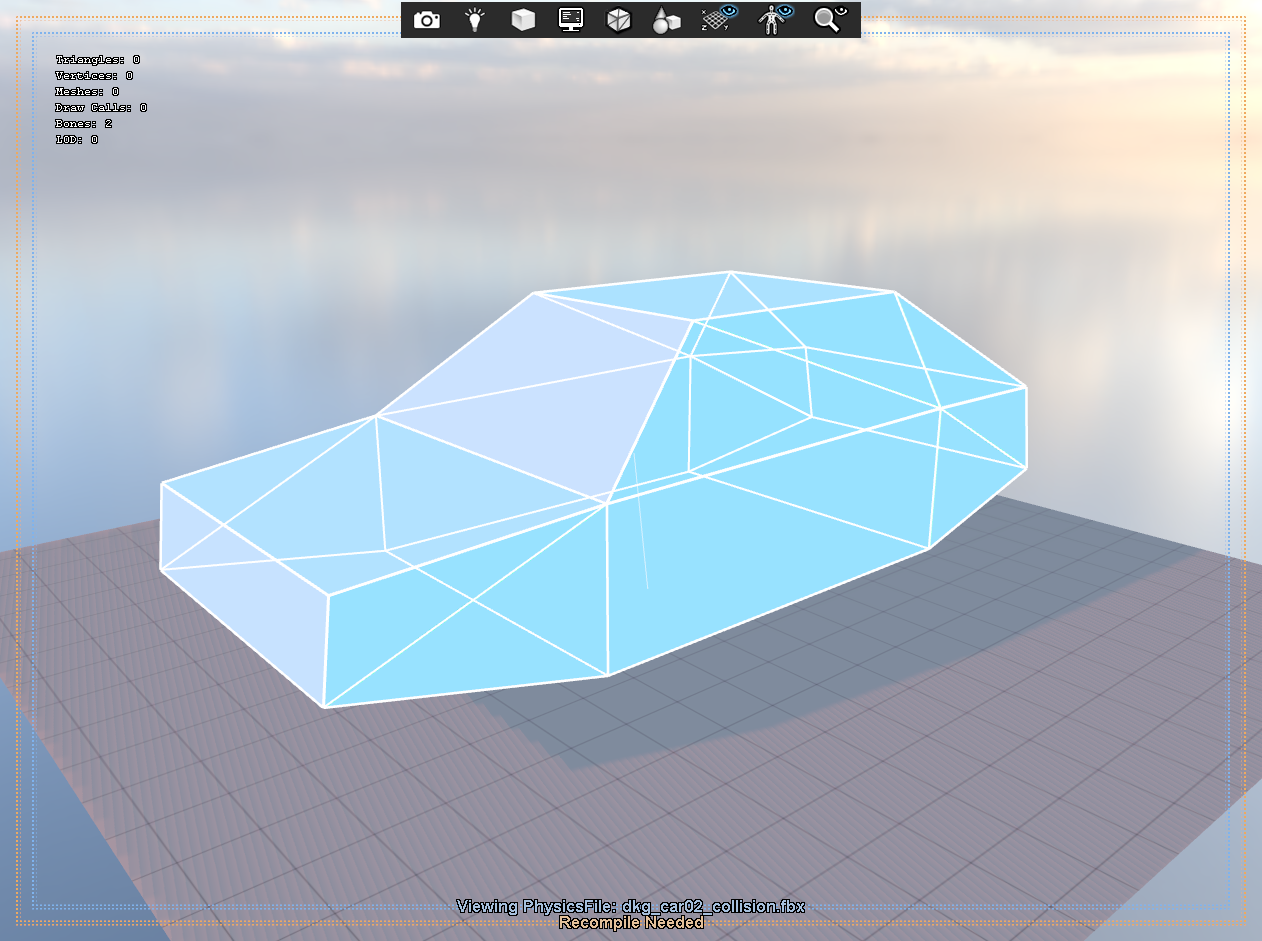
In ModelDoc in s&box, in your existing model asset, right click in the outliner and select Add... -> PhysicsHullFile. Select the collision mesh file you exported earlier.
If you don’t need a custom collision mesh, you can instead choose PhysicsShapeBox, PhysicsShapeSphere, PhysicsShapeCapsule, or PhysicsShapeCylinder depending on the shape you want. If your model isn’t too complex, you can also use PhysicsHullFromRender to automatically generate a collision hull from the model’s render mesh.

It might not look like your collision mesh yet. Notice how the faces are not aligned properly to your expertly crafted mesh. You need to configure it.
Step 4: Configure Collision Meshes
Select the PhysicsHullFile you just added. In the node editor panel, set the following properties:
- Import Mode: Set this to
Hull Per Elementto create a separate convex hull for each split part of the collision mesh. - Optimization Algorithm: Set this to
Exact Hullto get exactly the shape you created in your 3D software.

You should now see the collision mesh overlaid on your model. Compile and save.
Step 5: Test Collisions
Add the model to your scene by dragging it from the asset browser into the scene, or add a ModelRenderer, a ModelCollider, and a RigidBody component to a GameObject and configure them to use your model.
Is the model falling through the floor?
You might have accidentally chosen PhysicsMeshFile instead of PhysicsHullFile in Step 3. PhysicsMeshFile uses a non-convex mesh collider, which is not supported for dynamic objects. It’s fine if you want a static object to have a non-convex collider, but for anything that moves, you need to use convex colliders.